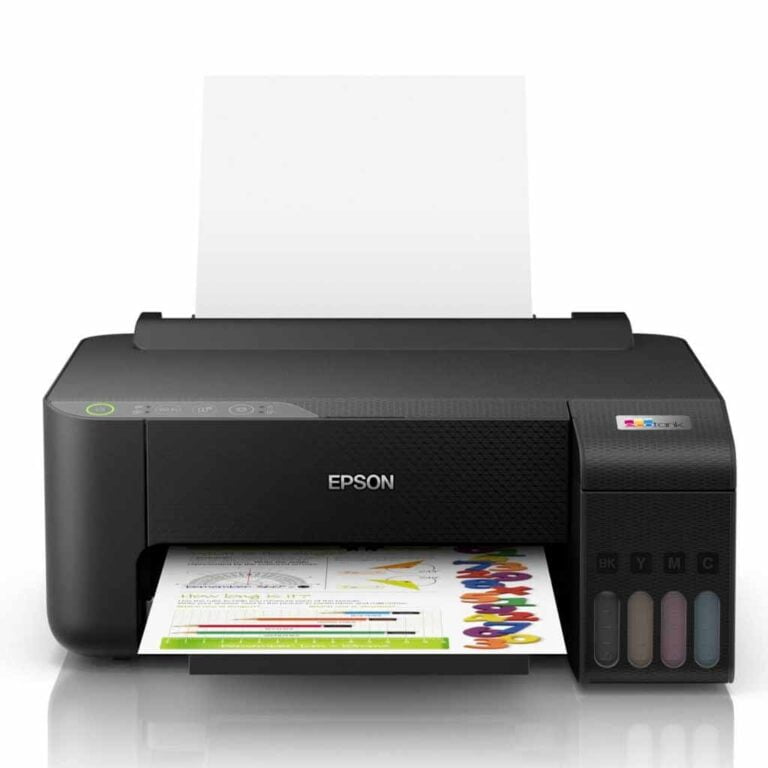
Sublimation printers are fantastic for both home crafters and small businesses. They provide a cost effective production of custom items with minimal effort. Sublimation ink is different to normal printer ink and the dye has different chemicals required for the sublimation process.
Quick Links:
Nozzle Checks Head Cleaning Trouble shooting Incorrect Colours Dotted Lines FAQ Manual Head Cleaning
Firstly lets cover maintenance that will reduce the possibility of problems occurring.
Sublimation Printer Maintenance
Regular Printing:
Problems occur with sublimation printers when the moisture in the ink evaporates and the dye is left on the head then hardens, left long enough, the hardened ink will never be removed without damaging the head and causing hours of frustration.
Printing an image regularly (once a week minimum) that uses all of the colour channels in the head (C,M,Y,K) will keep the ink flowing through the head and maintain lubrication so that hardened ink does not settle upon your head and block nozzles.
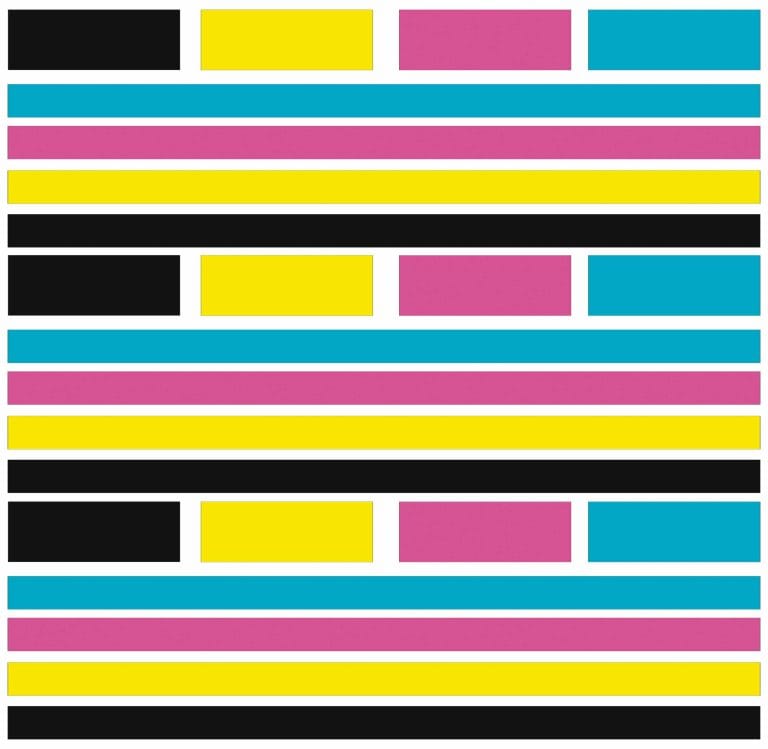
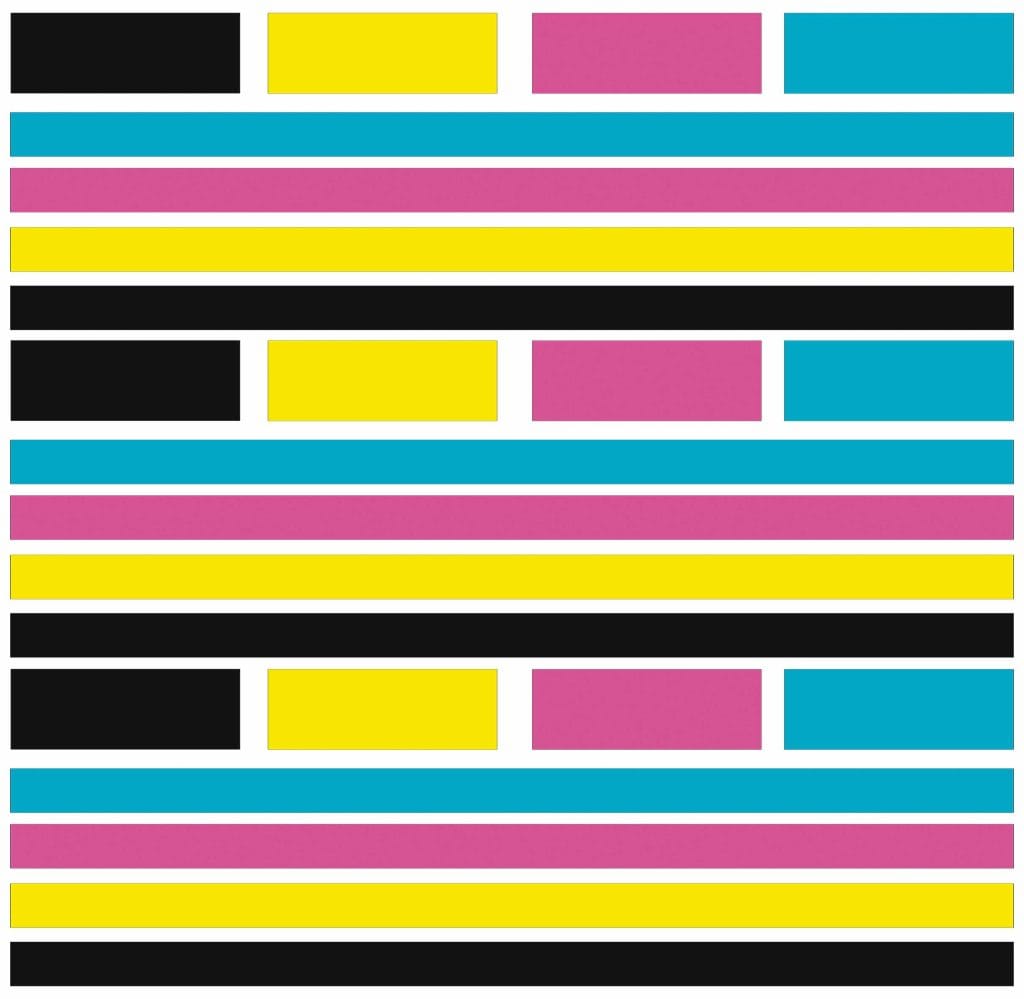
Below is a test print that we suggest that you set an alarm on your phone to print weekly, if you have printed in the last 24 hours, ignore the alarm and wait for next weeks reminder.
Prior Preparation:
In all printing shops it is regular practice to print a nozzle check prior to printing the first print of the day, this allows you to know that the printer has all of the colour channels printing through the head without blockages.
This saves time and wasted prints, if you have a blocked colour channel, there is no point printing anything as you will not achieve the correct colours and or have banding and other problems. See below under head cleaning to see how to access printer maintenance to print your nozzle check.
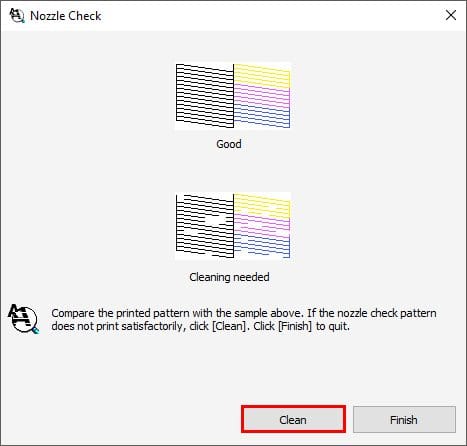
Nozzle check patterns look different dependant upon the amount of colour channels that you printer has, but the universal thing that you are looking for is that the Nozzle check has no breaks. While a tiny missing piece can sometimes have no effect and naturally disappear with use, if you have a significant line break there is no point continuing to print. The blocked nozzle needs to be cleared before printing.
Head Cleaning:
To clean ink lodged upon the head, the printer can perform a head clean, which pushes fresh ink through the nozzles at different frequencies, hopefully dislodging any stubborn hardened ink from the surface of the print head. Head cleans also use a wiper system usually to wipe the surface of the print head upon finalisation to physically remove the stubborn ink.
Head cleans do use ink and also fill maintenance tanks/pads which will require replacement upon being filled. Please do not overclean your printer, there is no need to clean the head of your printer if your nozzle check is clean and not showing any breaks in the lines.
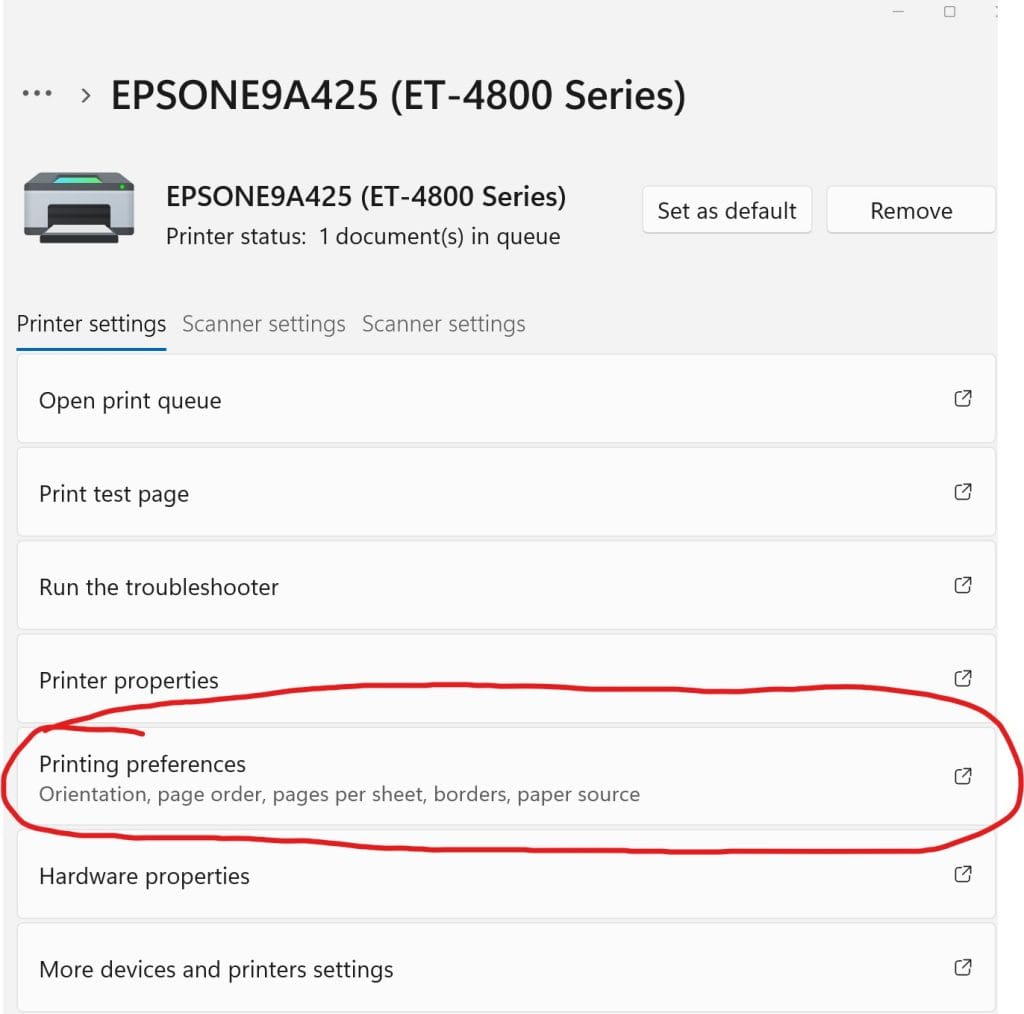
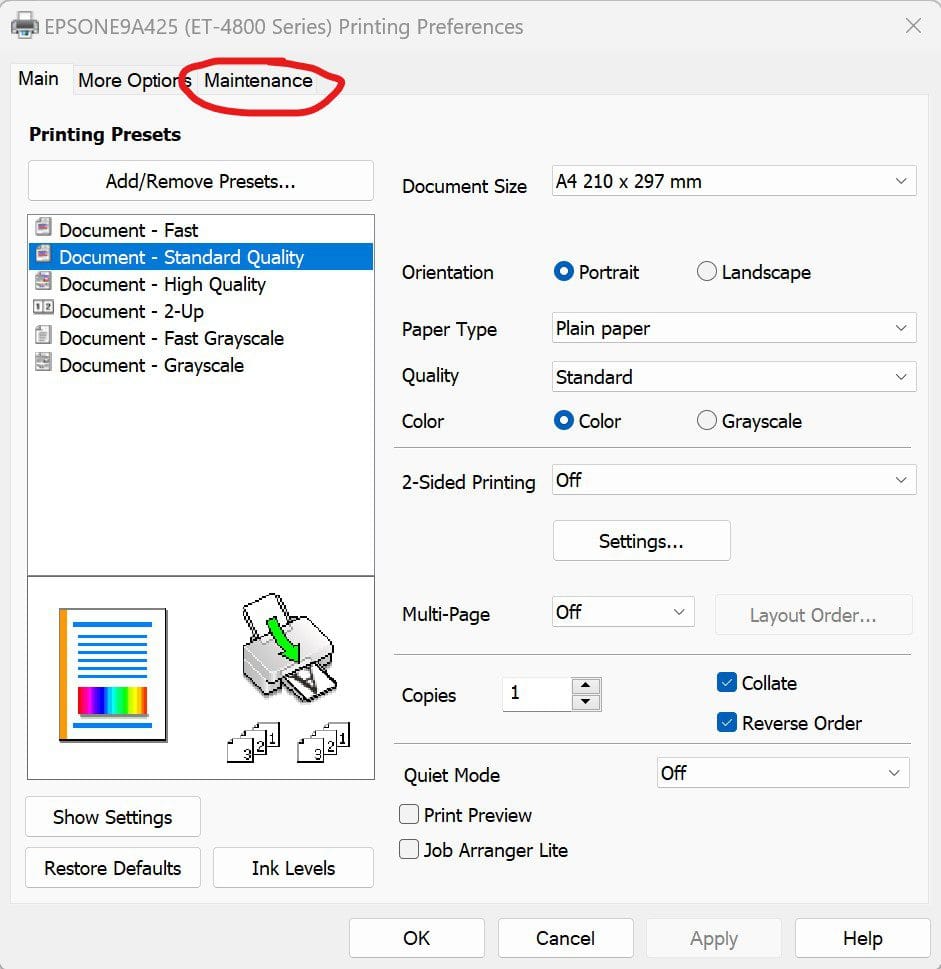
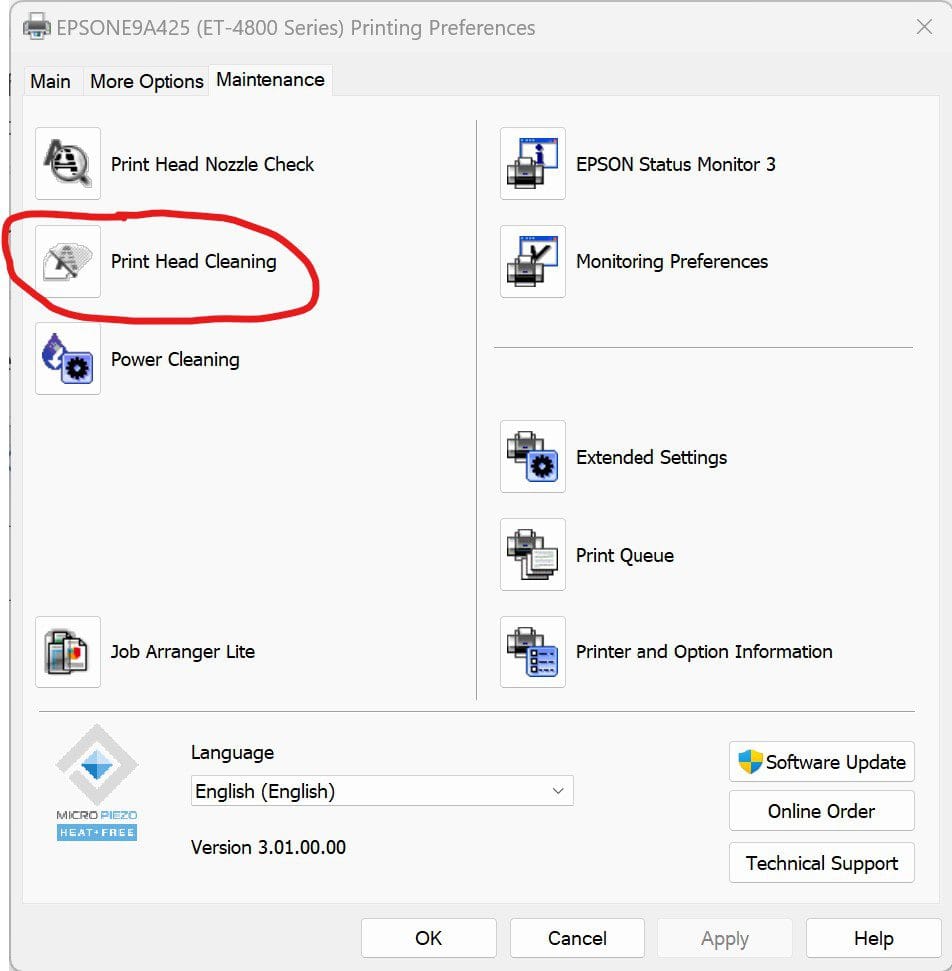
To perform a head clean on your printer, go to printers on your computer, select your dye sublimation printer, click on printing preferences, then on the tab “Maintenance” as shown below:
Epson heads use Peizo technology, which is not thermal, so continued head cleans do not overheat the head, but giving time between head cleans allows ink flows to happen, gravity to take effect and air bubbles time to move. We suggest printing a nozzle check after a head clean to check the progress, then is the line breaks continue, proceed to head clean again up to three time and then give the printer some time to settle, usually overnight or 30 minutes depending on the urgency of the clear. Once you have a clear nozzle check you are ready to print your sublimation prints with confidence.
Some printers have the availability of power cleans, this is the next step if you can not achieve a clear nozzle atter after following the above steps. Numerous printers will not allow this process unless you have room in your waste tank, it is always good practice to carry a spare waste tank to be on hand in the event that you are needing to carry out this procedure. It is best to leave the printer for some time to settle after performing a power clean, usually overnight will suffice. NOTE: Power cleans use a lot of ink and fill your waste tank, they should only be performed as a last resort.
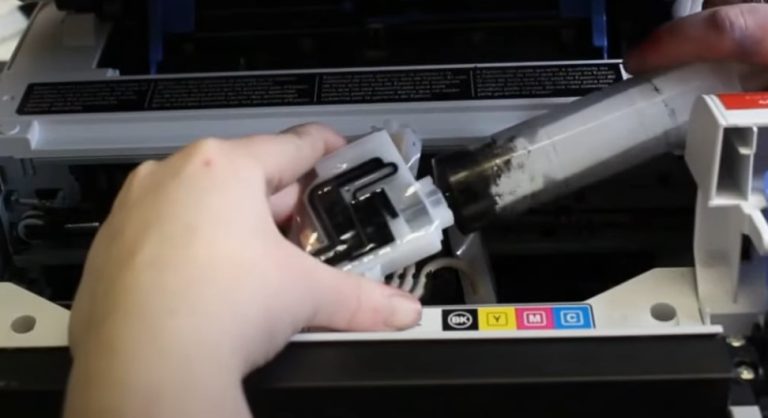
Blocked Heads and Manual Flushing:
We will not go into too much detail in this article about manually flushing your print head, but if you are not mechanically minded and comfortable with dismantling components of your printer, we suggest seeking out an Epson service agent to attend to your printer for you. This will be at your expense, as the printer is required to be used regularly to maintain flow of inks and healthy heads. The only reason that a head is blocked and can not be cleared is either due to old age/end of life cycle, lack of use or head strikes (Head hitting something physically), no other reason.
If you are adventurous, at the end of this post we cover manual head cleaning.
Sublimation printer Troubleshooting
Flashing Lights:
If you printer has flashing or solid lights on the printer, please download the user manual for your printer from Epson Australia and in the troubleshooting section it will tell you the related problem to the flashing/solid lights.
Printer Stops During Printing:
This is almost always wifi connected printers, whilst you may think this is caused by the printer, it is almost 100% of the time related to your router. We have had many cases of people having this problem and when the printer is changed to a USB connection type, the problem no longer occurs.
Incorrect Colours:
Please understand that dependant on your ink, the variance will change, but the printed image on paper will not represent anywhere near the final image until heat activated and the sublimation process occurs. We highly recommend that if your new to sublimation and setting up a new printer or changing ink, that you buy white polyester for testing prints on before wasting sublimation blanks. Press in a flat press at 190c for 60 seconds at high pressure to see results.
Incorrect colours from new:
If your sublimation printer is printing (after pressing the item) incorrect colours and you have never achieved correct colours before, you most likely are wither not printing from a proper graphics program like Photoshop or Affinity for example. When printing from numerous programs like silhouette studio or alike, they do not handle colour profiles and will not achieve correct/consistent colours.
Please contact the supplier of your ink and printer and ask for the instructions and ICC profile for your printer. An ICC profile is a colour map that tells the printer the correct amount of ink to mix to achieve correct colours for that ink. Without it, you will be using the Epson printer ICC profile designed for genuine inks and will not achieve correct colours. Dedicated dye sublimation printers like the SC-F160 and F560 are automatically installed and assigned upon installation of the driver software.
Incorrect Colours when it was printing well:
This usually happens upon a software update of computer change. A lot of people forget to re-install the colour profile to the device/ don’t install the printer driver, or lose settings after a software update. If your printer is printing a clear nozzle check, something has changed in your hardware/software settings that is causing the printer to have lost the ICC profile/printer settings. Please re-install and apply settings as per suppliers directions.
Dotted Lines Vertical through Prints:
This can happen on both converted and dedicated dye sublimation printers, it can be caused through numerous reasons. It is usually the “Pizza Wheels” hitting the media (paper) and leaving wither white or black dots vertically on the print.
Paper:
Every printer is slightly different, you have not paid $500,000 for your printer and the clearances are slightly different on all printers due to tolerances in the manufacturing process. The different weight and properties of paper will perform in printers differently in one printer of the same model to someone elses.
For example, we have had customers that get regular pizza wheel marks on Koala A-Sub paper and when they switch to SureColour paper, this removed the problem. This has also happened in reverse for the same printer models. In short summary, due to the varying tolerances, one paper sits in the correct position for that persons printer as opposed to another persons printer. We suggest trying a different media to remove this problem if it consistently occurs.
Ink Levels:
In our instructions we always suggest plain paper for media settings on the printer in converted printers, this uses the least amount of ink possible, which reduces the likelihood of wet ink passing through the pizza wheel guides, which builds on the spring shaft, pushing the wheels down, generating the problem.
Dedicated dye sublimation printers use approximately 60-70% of the ink that converted printers use, which reduces the likelihood of pizza wheel marks, but the can still occur. If you have your printer preferences set to Matte Paper, please change to plain paper, clean pizza wheels and try again.
Printing Borderless:
Please refrain from printing borderless on converted printers, printing to the edge of paper is not healthy for the printer, the paper is never perfectly aligned to where the ink is printed. The ink that is not perfectly aligned, prints on rollers and is splashed around the printer, ending up on pizza wheel springs, pushing the wheels down and causing the marks. If you need to print slightly bigger than A4, please use US legal/Letter which is 216mm wide allowing a print of 210mm without printing over the edge of the paper, this allows for a full tumbler wrap, which is why most people try to print borderless.
Please DO NOT print borderless unless you want problems with ink stains and pizza wheel marks on your prints.
Cleaning Pizza Wheels:
While changing the above mentioned causes may fix the cause of the problem, you will need to clean the pizza wheels to stop the problem from occurring. The pizza wheels sit on a spring, when excess ink sits on the axle of the pizza wheel, it makes the shaft thicker, pushing the pizza wheels down and causing this effect.
You will need to remove the built up ink from the shaft so that the pizza wheel guides return to their location, which does not tough the print. To do this, we will refer to a videos from other sources below.
As a brief explanation, use firm paper/thin cardboard (a4 printer paper folded into 4 does the trick) or ribbon. Place cleaning solution on the pizza wheels, feed the media in and out causing the springs to move that hold the pizza wheels and this will remove the excess build up of ink.
You can source cleaning solution from us Izumi Cleaning Solution or at our other store DTF Cleaning Solution.
Click here for a videos on cleaning pizza wheel marks:
Cleaning pizza wheel marks video 1.
Cleaning pizza wheel marks video 2.
Sublimation Printer Maintenance FAQ
Go to printers > Printing Preferences > Maintenance > Print Nozzle check. Look at the pattern printed, if the pattern has breaks or missing segments it requires a head clean or further maintenance.
Go to printers > Printing Preferences > Maintenance > Head Clean. After the head clean has completed, please print a nozzle check to confirm that the nozzles are clear and printing nicely.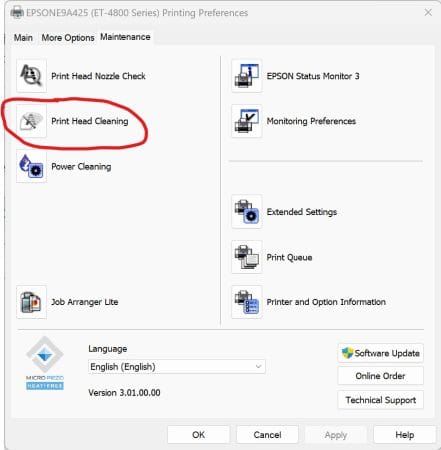
Epson printers are non thermal heads, so you can do many head cleans, but we recommend the printer be left overnight if after more than 5 cleans, you do not have a clean nozzle test pattern.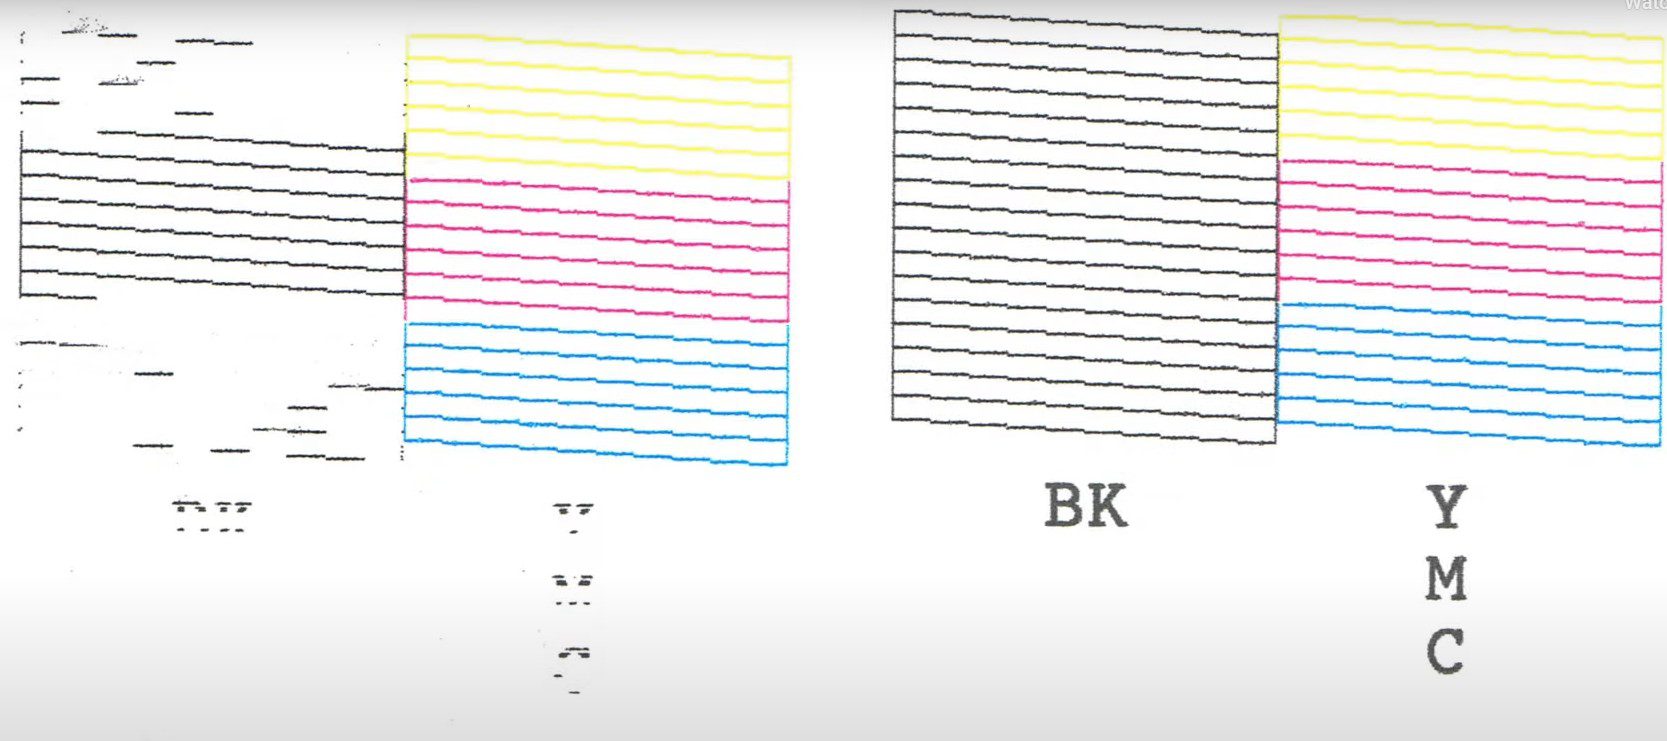
If your printer has a power flush, carry out this procedure. If this does not fix, we suggest you either carry out manual cleaning or contact a professional to carry out the procedure. NOTE: This uses a lot of ink and fills your waste ink cartridge.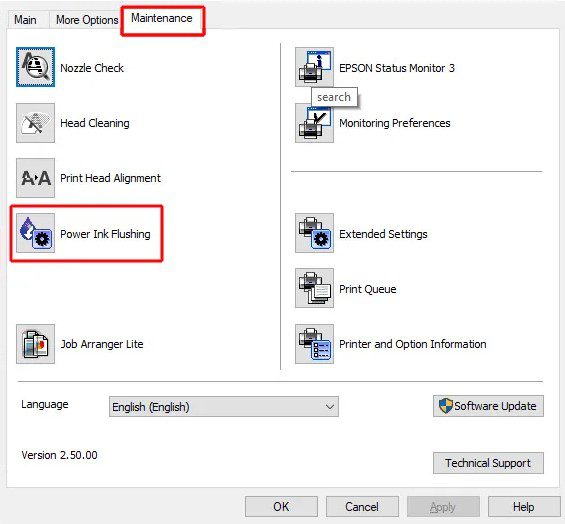
Please see the instructions below on how to manually clean your print head. This should be used as a last chance to save your printer after all of the above steps have been carried out.
Manual Head Cleaning
Time needed: 30 minutes
How do I manually clean my EcoTank printer (Last chance step)
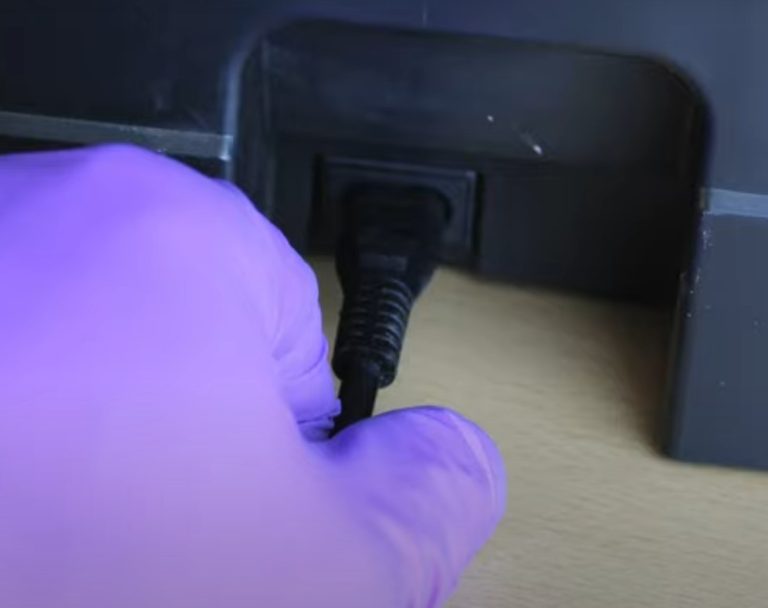
- Free the head from capping station.
Print a file, while the file is printing disconnect the power from the printer, leaving the print head mid printing.

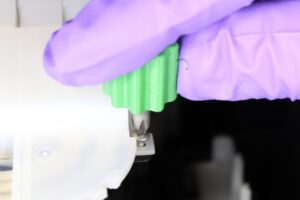
- Get Access to the dampers.
Undo the screw of the head cover plastic plate.

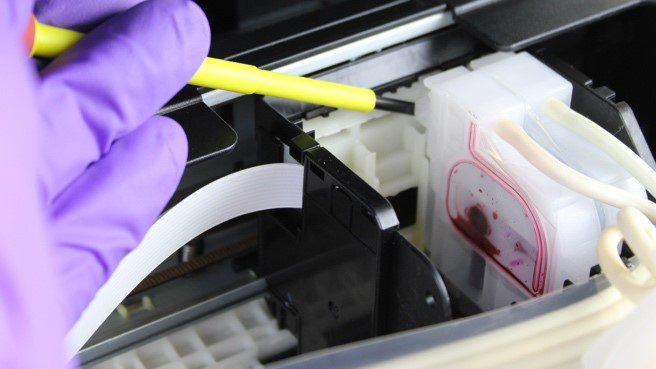
- Remove Dampers.
Using a screwdriver or similar lever from the back each damper until it becomes free and remove from top of the head.

- Check Dampers.
Check hat the dampers have no air pockets, head cleans may not have worked as there was no ink at the printhead and air locks stopped the ink from flowing. If your dampers are empty, you should potentially prime, skip head cleaning, re-assemble, and try head cleans again.

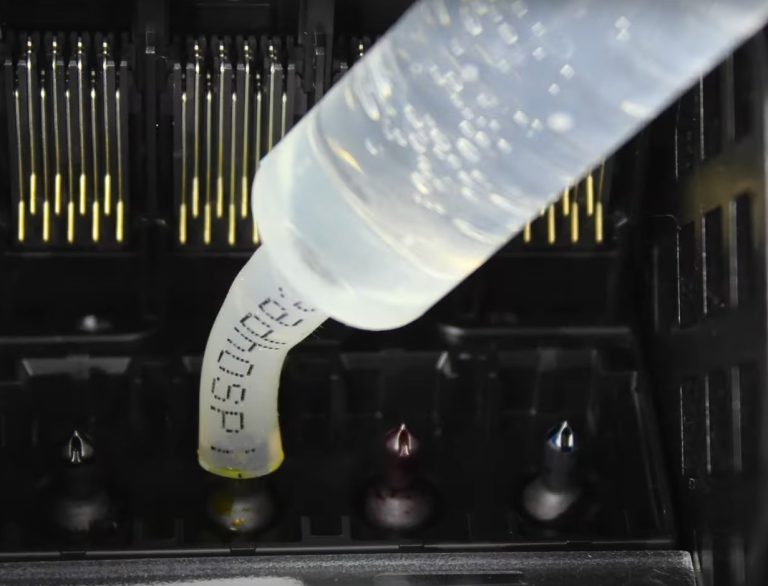
- Clean the head.
Lay down a small amount of paper towel under the head, move carriage on top of towel, use 5-10ml cleaning solution to flush through the head (Softly!). Dispose of paper towel.

- Prime Dampers.
Using a syringe, draw through the ink to the dampers until the damper is full of ink and free of air locks.

- Re-Assemble Printer and Head components.
Place dampers back into position, Place head cover plate on top of head and secure. Return the head to the home position (right hand side if looking from the front. Power up printer.

- Test printer.
Perform Head clean, nozzle check and test prints as required.